
Getting started
Getting started
Getting started
To begin using PsychNow, you must first set up your provider account. This will unlock your personal consultation request links needed for prospective patients to request a consultation.
To begin using PsychNow, you must first set up your provider account. This will unlock your personal consultation request links needed for prospective patients to request a consultation.
To begin using PsychNow, you must first set up your provider account. This will unlock your personal consultation request links needed for prospective patients to request a consultation.
After logging in for the first time, click your name and then click Account settings.
After logging in for the first time, click your name and then click Account settings.


Specifying account settings
Specifying account settings
Specifying account settings
Profile
Profile
Profile
Under the profile tab:
Under the profile tab:
1) Upload a profile photo.
2) Specify your email signature. This will be used for system generated messages to patients.
3) Click the Save changes button.
1) Upload a profile photo.
2) Specify your email signature. This will be used for system generated messages to patients.
3) Click the Save changes button.

Appointment scheduling
Appointment scheduling
Appointment scheduling
Under the appointment scheduling tab:
Under the appointment scheduling tab:
1) Specify one or more methods for patients to schedule appointments.
1) Specify one or more methods for patients to schedule appointments.
2) Click the Save changes button.
2) Click the Save changes button.

Consultation request links
Consultation request links
Consultation request links
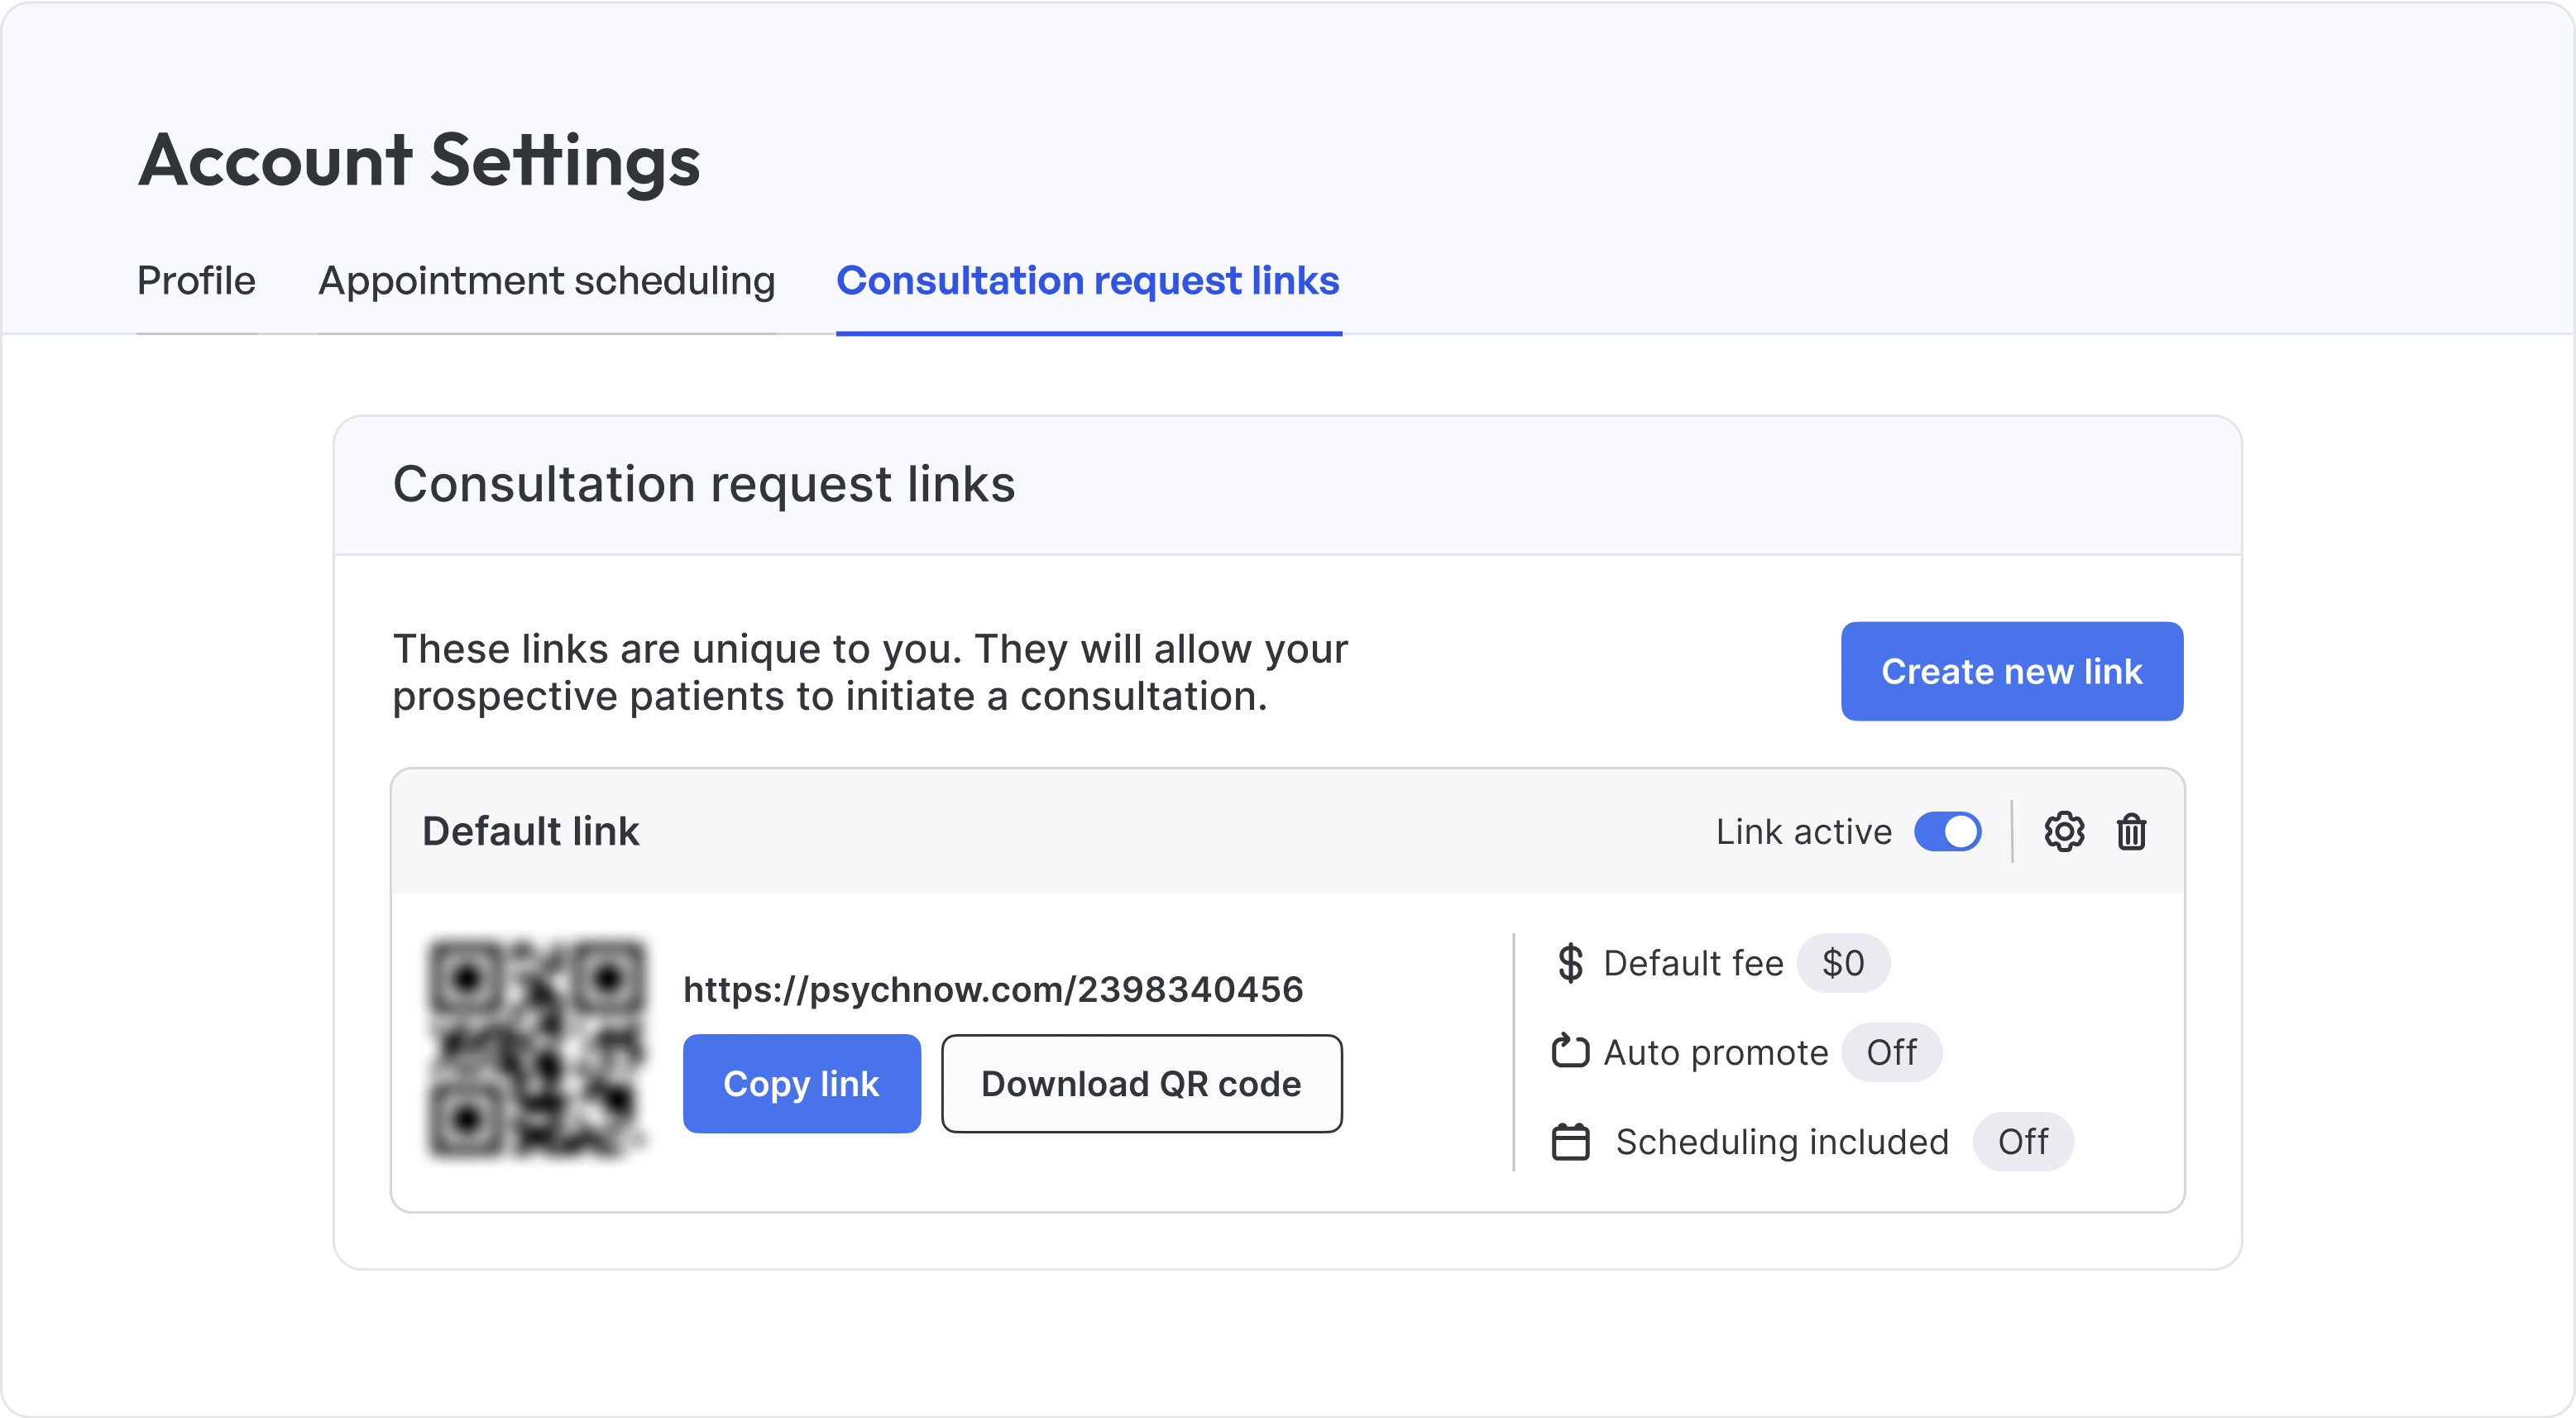
Once your account settings have been saved, your personal patient invitation link and its associated QR code will appear in the Consultation request links tab on your settings page.
Once your account settings have been saved, your personal patient invitation link and its associated QR code will appear in the Consultation request links tab on your settings page.
Creating and configuring consultation request links
Creating and configuring consultation request links
Creating and configuring consultation request links
Once configured, each provider account has a single default consultation request link. You can configure the link by pressing the gear icon in the link's title bar.
Once configured, each provider account has a single default consultation request link. You can configure the link by pressing the gear icon in the link's title bar.
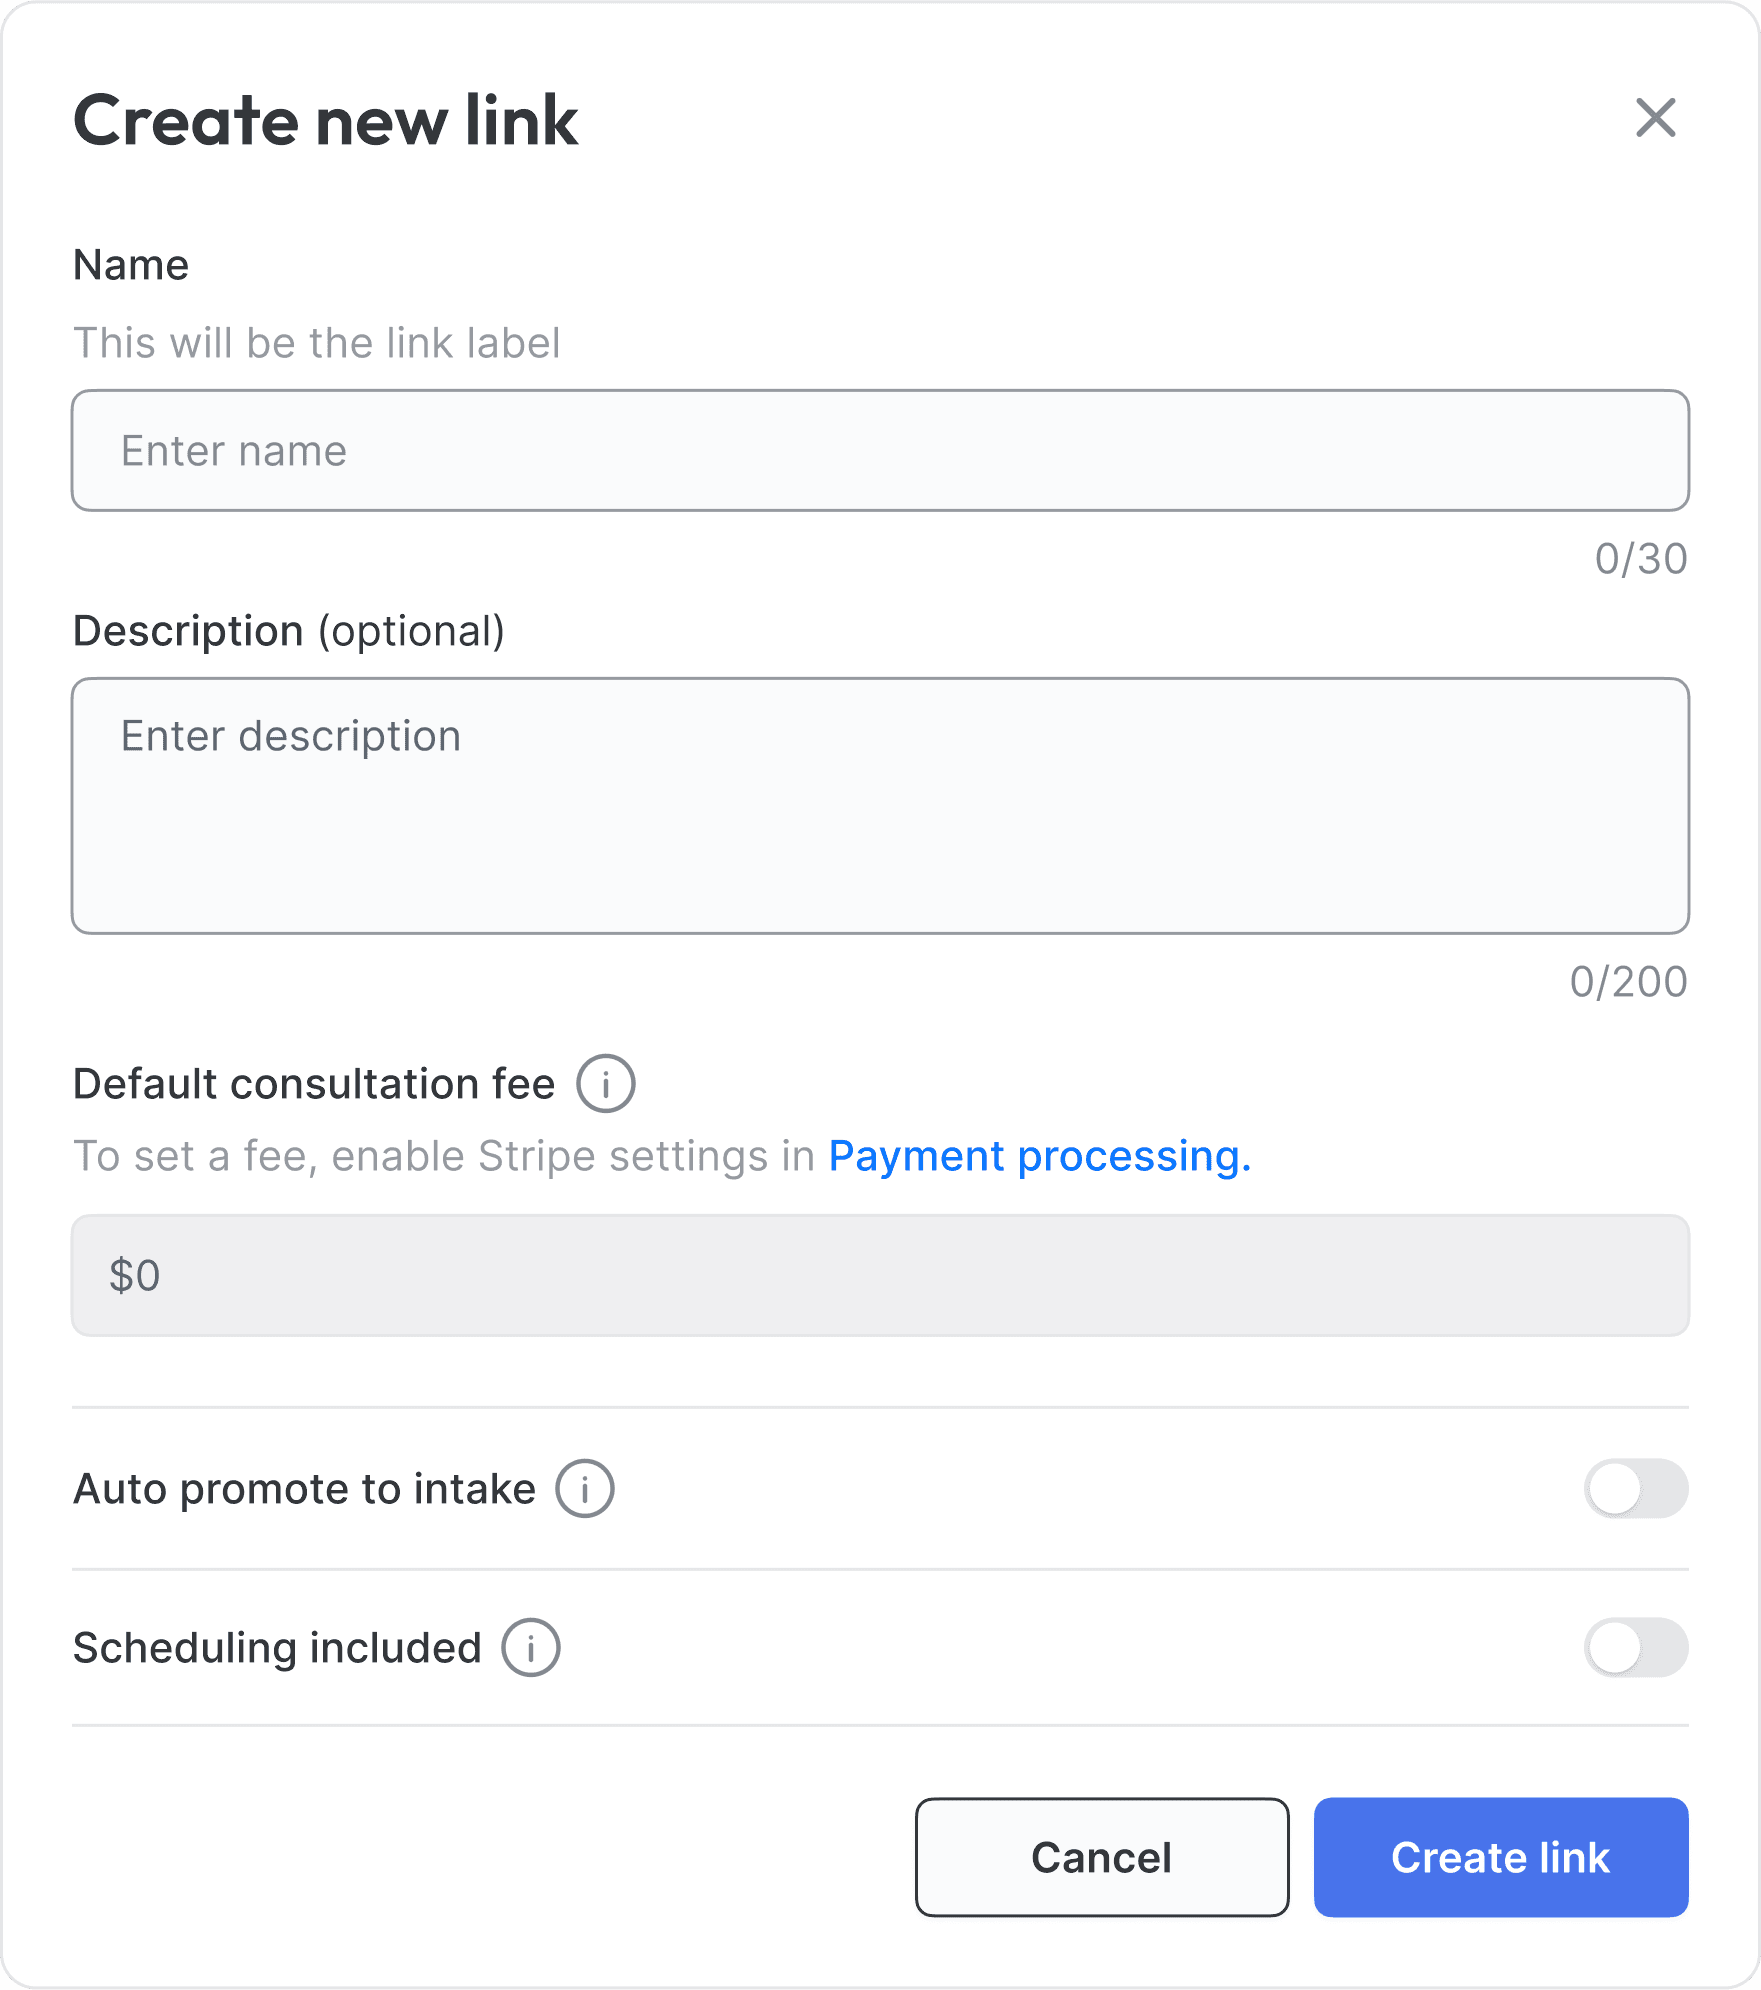
The link name and description are visible only to you. The link name is included in the patient consultation so you know which link the patient used to begin their consultation.
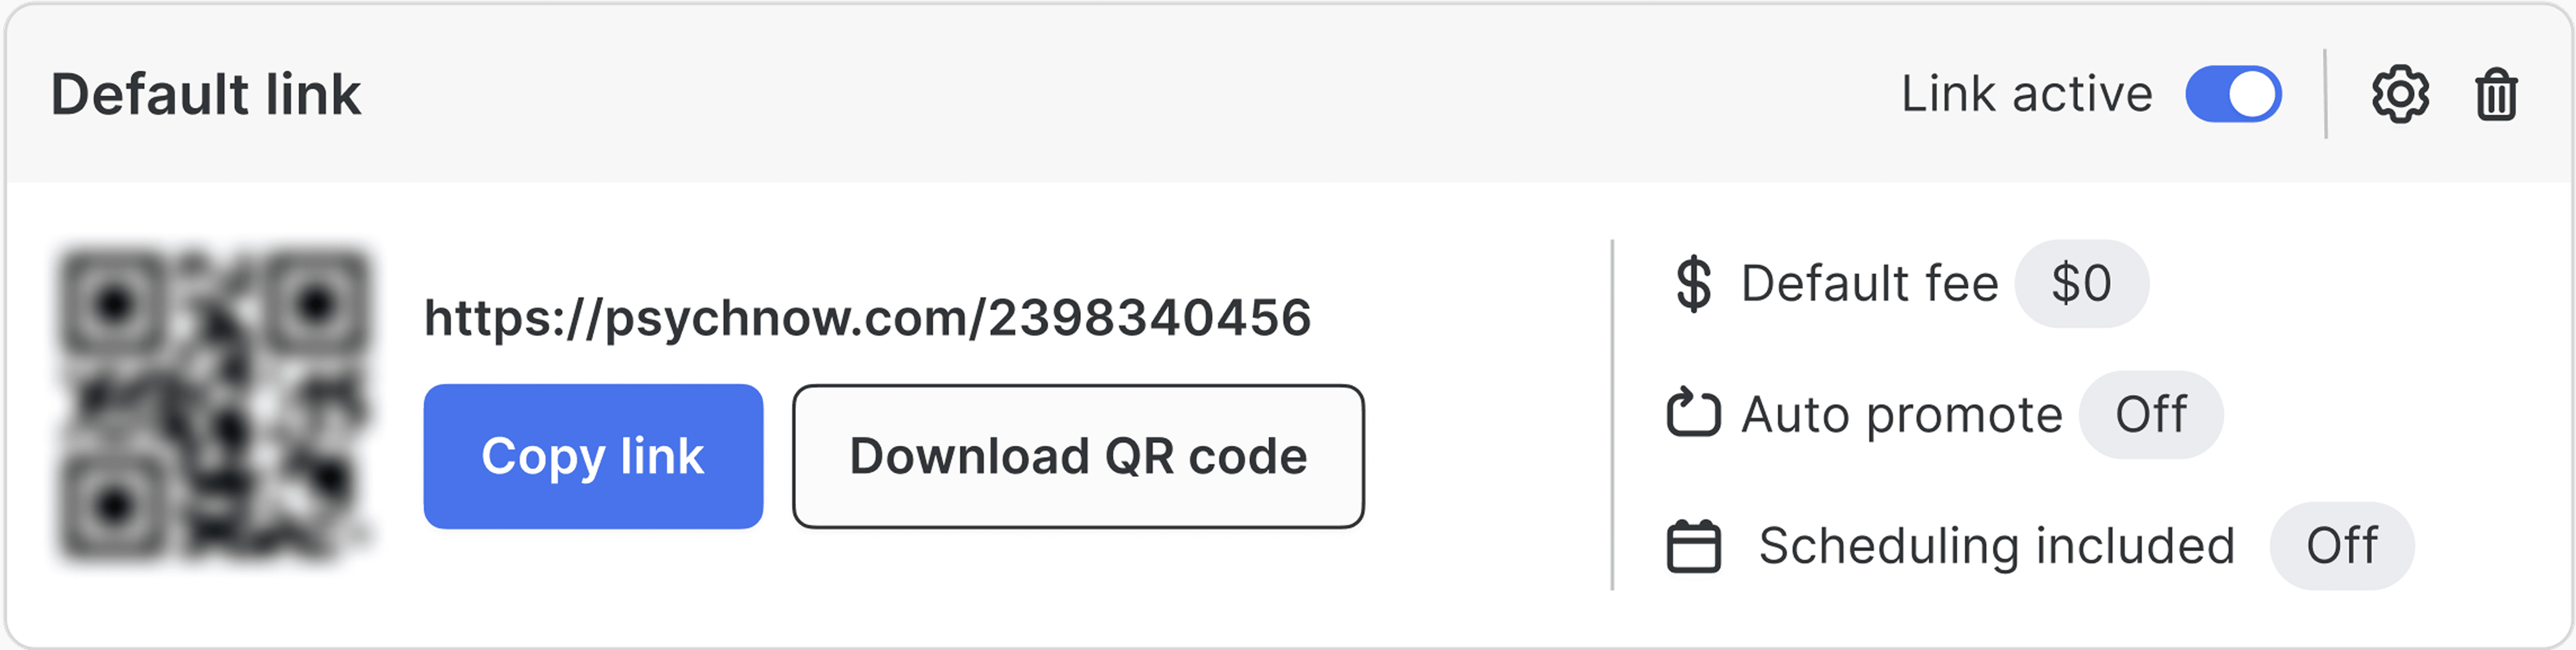
If you have configured your Stripe settings in the Payment processing settings tab, then you can set a default fee for this link.
If Auto promote to intake is set to "on", then patients are automatically promoted to intake upon submitting a screening. This allows patients to complete the screening and intake as one continuous flow. This is useful for "warm" referrals, where you know in advance a patient is a good fit for practice and does not require an explicit screening step.
Note: If you set a default consultation fee and turn auto promote to "on", you will not have an opportunity to set a patient-specific fee. Patients will be automatically promoted to the intake and will be charged the specified default fee.
If Scheduling included is set to "on", patients are prompted to book a meeting with the provider after submitting the intake. Patients are shown the scheduling methods specified in the provider settings.
If Scheduling included is set to "off", then this step is skipped. This is useful for inviting patients who already have appointments to complete the screening and intake. For example, some external patient referral websites require patients to book an appointment as the first step before they are referred.
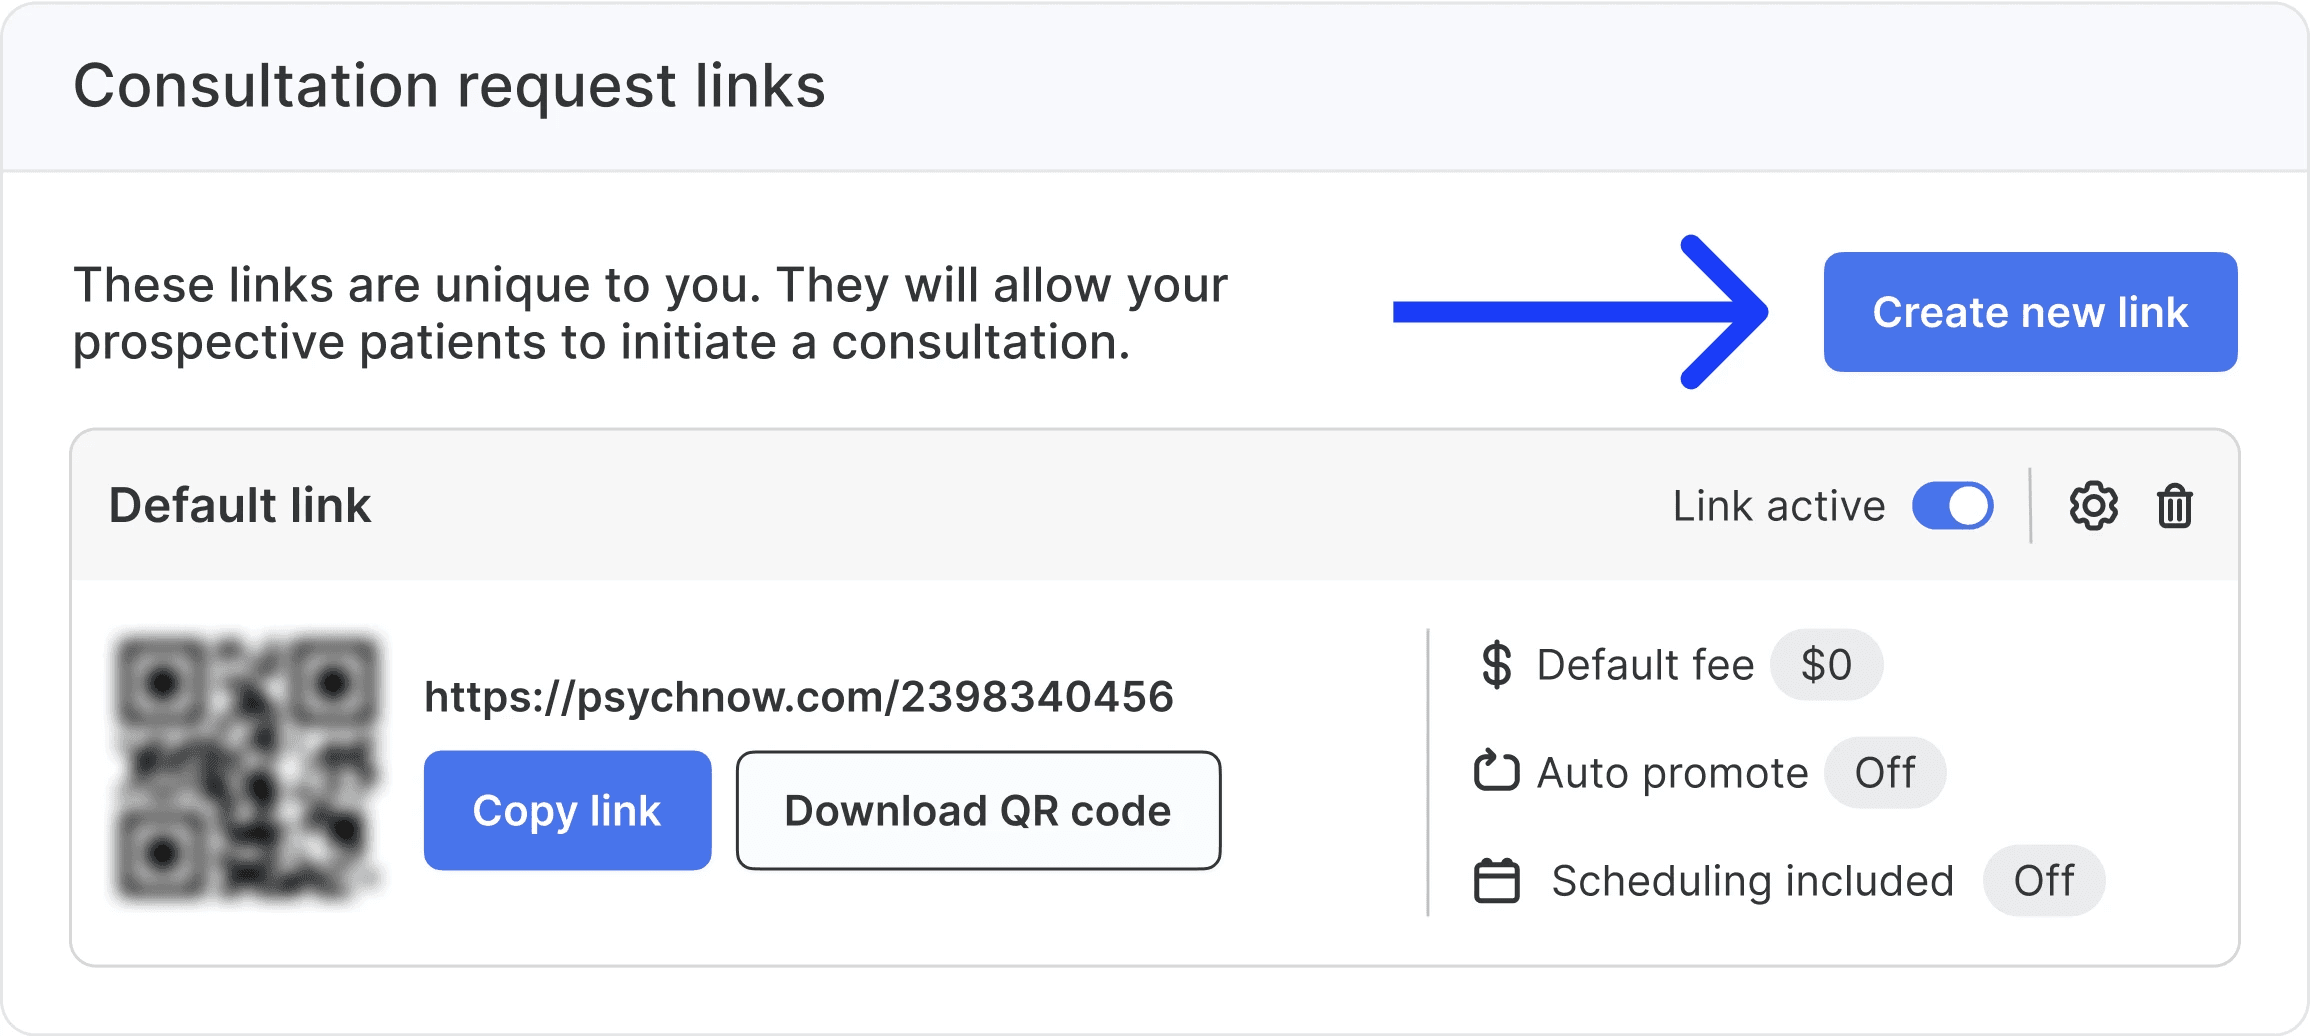
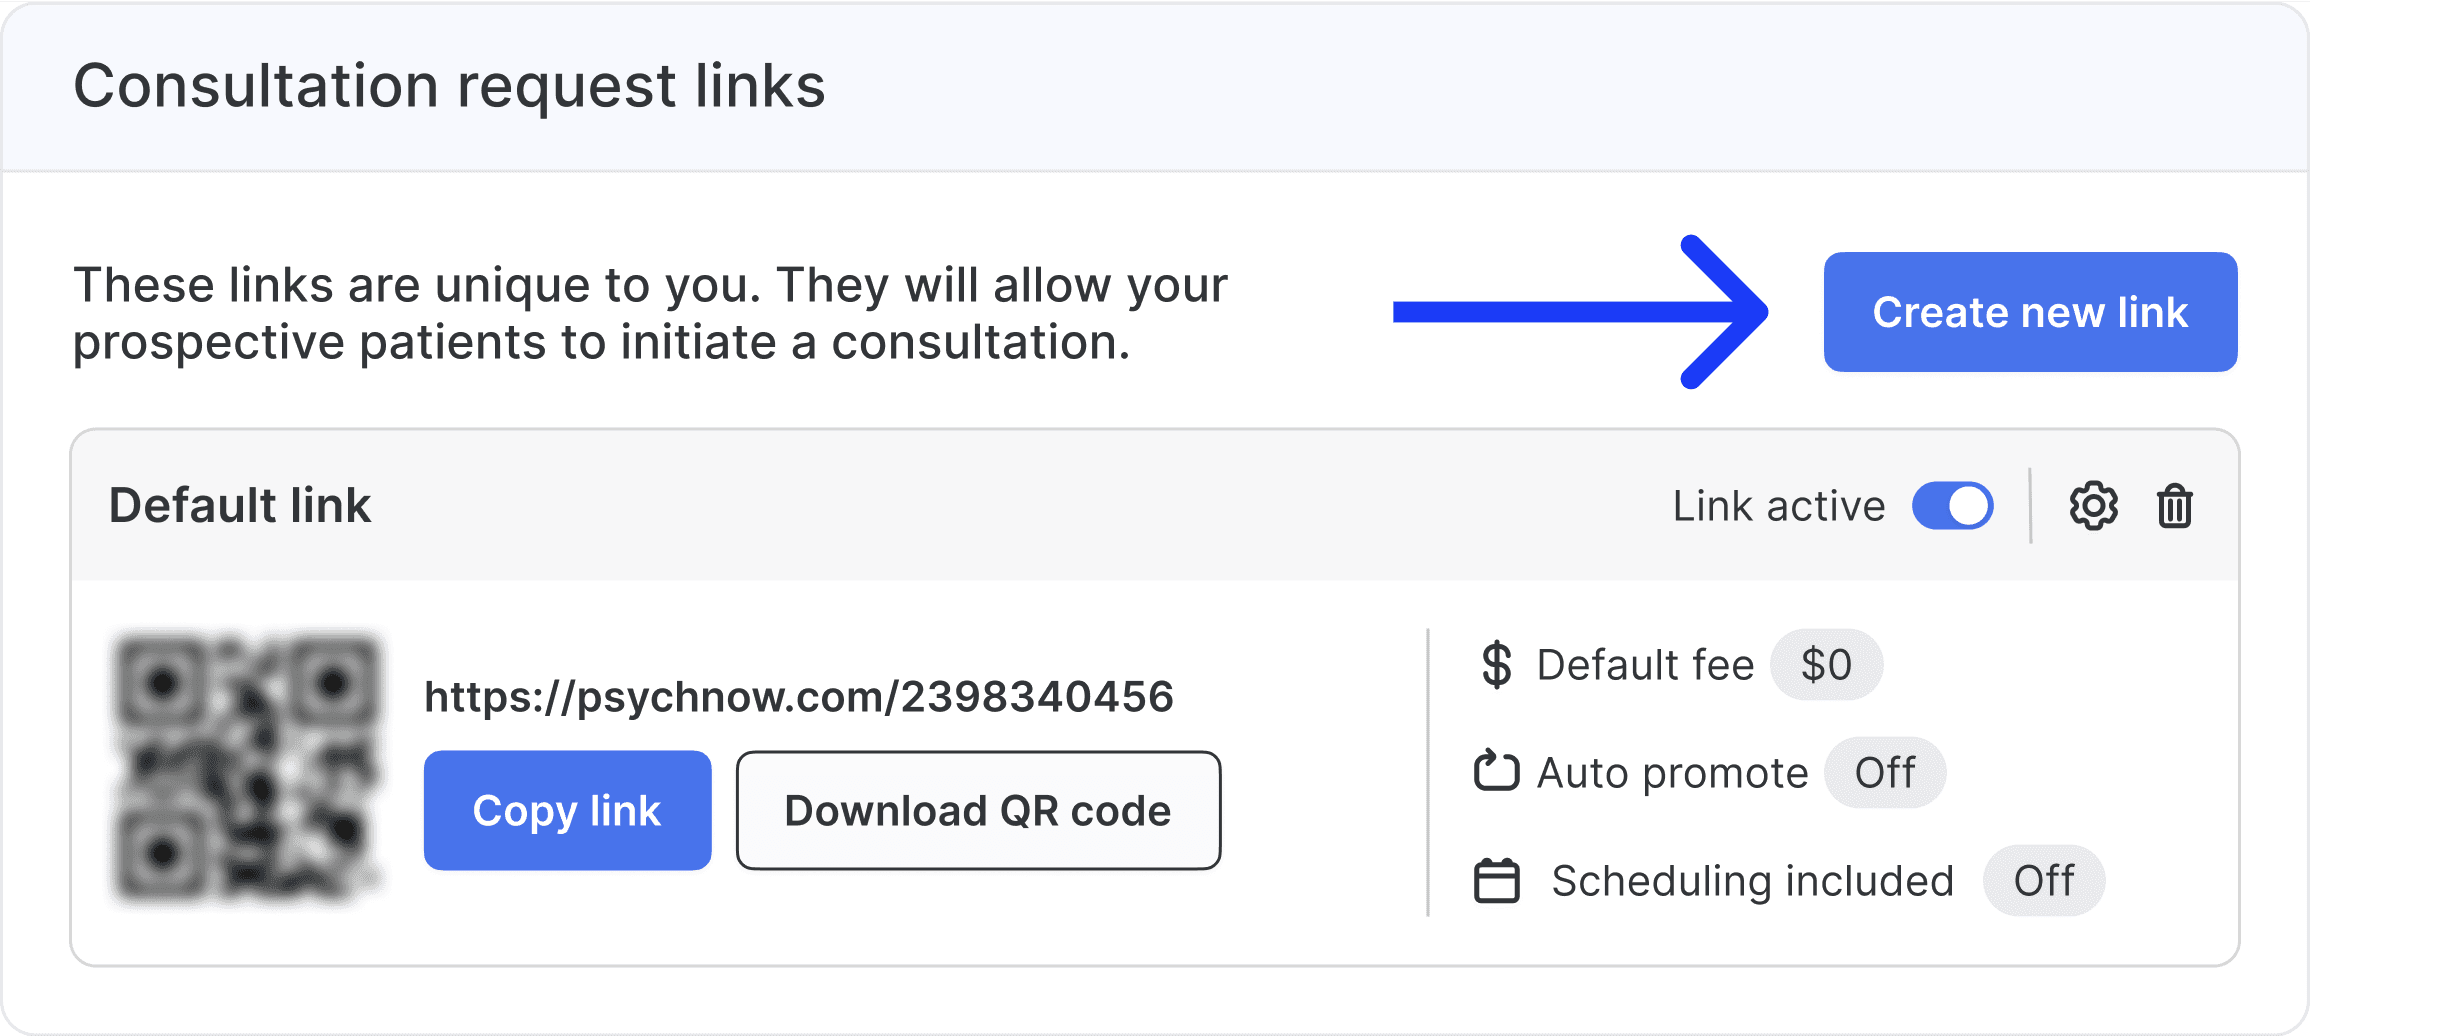
You can create additional consultation request links by clicking the Create new link button.
The link name and description are visible only to you. The link name is included in the patient consultation so you know which link the patient used to begin their consultation.
If you have configured your Stripe settings in the Payment processing settings tab, then you can set a default fee for this link.
If Auto promote to intake is set to "on", then patients are automatically promoted to intake upon submitting a screening. This allows patients to complete the screening and intake as one continuous flow. This is useful for "warm" referrals, where you know in advance a patient is a good fit for practice and does not require an explicit screening step.
Note: If you set a default consultation fee and turn auto promote to "on", you will not have an opportunity to set a patient-specific fee. Patients will be automatically promoted to the intake and will be charged the specified default fee.
If Scheduling included is set to "on", patients are prompted to book a meeting with the provider after submitting the intake. Patients are shown the scheduling methods specified in the provider settings.
If Scheduling included is set to "off", then this step is skipped. This is useful for inviting patients who already have appointments to complete the screening and intake. For example, some external patient referral websites require patients to book an appointment as the first step before they are referred.
You can create additional consultation request links by clicking the Create new link button.
Having multiple invitation links allows you to:
Track different referral sources
Set different fees for different sources of patients
Have a link with explicit screening (e.g. on a button on your website) and a different link with auto-promote (e.g. for warm referrals)
Each link has it's own URL and QR code, but all consultations will appear in your consultations tab, regardless of the link used to create them.
Adding consent forms
Adding consent forms
Adding consent forms
Organization administrators can access the admin tools by clicking on their name from the home screen and selecting “Admin tools” from the pop-up menu. In the Consent forms tab, you can upload any additional patient consent forms or terms of service for your organization.
Organization administrators can access the admin tools by clicking on their name from the home screen and selecting “Admin tools” from the pop-up menu. In the Consent forms tab, you can upload any additional patient consent forms or terms of service for your organization.

Patients will be required to check a box saying they agree to the terms specified in these documents before starting an intake. Patients will have an opportunity to download copies of the forms at that time. The forms must be in PDF format.
Patients will be required to check a box saying they agree to the terms specified in these documents before starting an intake. Patients will have an opportunity to download copies of the forms at that time. The forms must be in PDF format.
Adding supplemental questions
Adding supplemental questions
Adding supplemental questions
Organization admins can add supplemental questions to either the screening or intake portions of the consultation. These supplemental questions will appear at the end of the screening or intake in a section called 'Supplemental questions'.
To add supplemental questions, go to the Consultation options tab in the Admin tools.

Click the Add question button to add a question to either the screening or intake.
For each new question, you must:t
1) Select the question type:
Free text response
Multiple choice (either single select or multi-select)
Yes / No
Click the Add question button to add a question to either the screening or intake.
For each new question, you must:
t
1) Select the question type:
Free text response
Multiple choice (either single select or multi-select)
Yes / No
2) Specify the question text
3) For multiple choice questions, specify single select or multi-select
2) Specify the question text
3) For multiple choice questions, specify single select or multi-select
For example, a clinic that offers TMS treatment may want to know if a patient has a metal implant in their head (a contraindication for TMS).
For example, a clinic that offers TMS treatment may want to know if a patient has a metal implant in their head (a contraindication for TMS).

The supplemental questions can be reviewed on the Raw responses tab. They are not considered when generating the Preview tab.
The supplemental questions can be reviewed on the Raw responses tab. They are not considered when generating the Preview tab.

Bringing patient stories to light
Bringing patient stories to light
Bringing patient stories to light
Bringing patient stories to light